Do your carbs really need rebuilding?
Before you undertake any work on a bike, be sure it’s necessary. A frustrated bike owner posted online how a newly rebuilt motor ran great, for a few miles before running rough. At home, it was clear the head gasket was leaking badly but due to the rough running, the person assumed that the carbs were the first issue. Wrong. If a fundamental structural fault is present in the motor, no carburation tweak will fix that. In fact the rough running was directly caused by the head gasket. Do not be afraid to ask experienced people for their opinion.
Do you have the tools, space, time and budget to handle the work? Read through the pages of this site and you’ll get a good idea of ‘what it takes’. The worst thing you can do is tear something down without good preparation for the work ahead.
Warning – most vintage Japanese motorcycles have Overflow Tubes connected to a drain tip on the float bowls of their carbs and routed down by the rear wheel. You MUST use these tubes in case a carb malfunctions and overflows – that overflow is directed away from the hot motor. Often a starter is lurking in the motor case right below the carbs, with full battery power connected. It’s a perfect setup for a fire if you don’t use those tubes.
Carb Problem Analysis
Check out the most common problems and solutions for carb related problems.
Quickie Carb Cleaning
Sometimes this simple approach will clean up your carbs pretty well, without tearing them down. This is NOT a substitute for a full rebuild but it often works if the only real problem is old gas that’s dried in the carbs. This process saved me a lot of grief when I bought a six cylinder Honda CBX that had sat in a basement for four years with old gas in the carbs.
By the Way – CARB BODIES ARE NOT ALUMINUM!!
Carbs are made of “pot metal”, a zinc alloy that was used in the 1950’s and 60’s for heavy cooking pots, hence the name “pot metal”. Some other parts on carb assemblies may be aluminum but more often things like screws and steady arms or brackets are made of steel. More on this later.
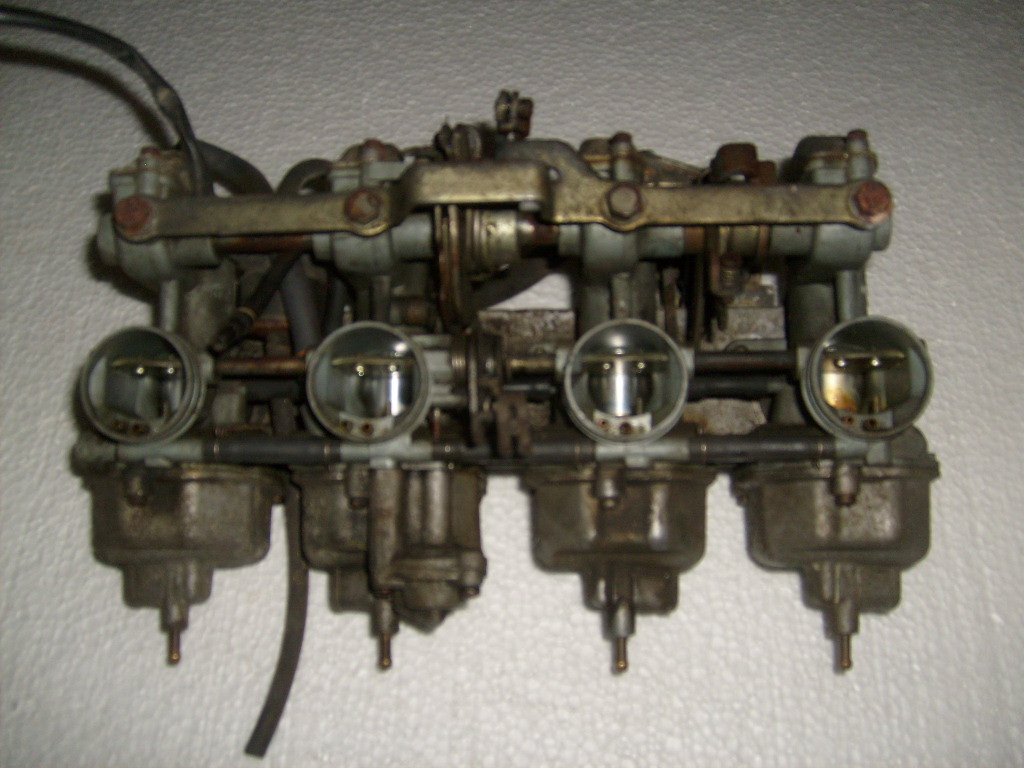
OK, let’s discuss “real” carb rebuilding. You may be surprised that despite the many brands, types and models of motorcycle carbs, they are all very similar. Most important, your success in doing carb rebuilds mainly hinges on your attention to detail, starting with tear-down, then cleaning, assembly and “bench sync”. If you master the basic concepts and techniques, you can do a credible job on just about any carbs.
Requirements:
- Clean space to work – about the size of an office desk is fine, best if the area can be locked up, so no kids, pets or other disaster can spoil your day.
- Reference material – sometimes shop manuals do not cover carb rebuild well but get whatever you can, even if it’s only a parts schematic. That at least will guide you to get parts assembled properly, but you should also have specs on jets and default setup information. Thanks to the Internet, this information is ‘out there’ if you do some searching. Do NOT Proceed without these basics.
- Storage containers for carbs & carb specific tools. I use plastic boxes with snap lids, about the size of a large shoe box for carbs. I use sandwich bags to keep all the small parts of each carb separate.
- Photograph & Label everything. Do NOT rely on memory, or you may end up going through unidentified bags and boxes, muttering “I know I had it somewhere!” while finding all sorts of things you forgot about.
Worse, if you work on several bikes at once, unlabeled parts can end up “misfiled” with parts for the wrong bike.
Pictures are a great help so you preserve a clear record of what you did and how, the order of parts, etc. BUT do take time to check your pics to ensure they are clear. - Keep carb specific tools and parts like jets, Orings etc. in a dedicated storage container.
- High E guitar string! It’s stainless steel, about .010″ in diameter and very durable. Though it will not go around corners in passages, it’s indispensable for probing and clearing passages.
- Screw drivers – don’t be fooled if you have a metric bike – some folks post on sites about the need for “JIS” screwdriver bits. JIS is a Japanese Industry Standard which defines the specs of screws (and other industrial parts) used in Japan.
You do not need JIS screwdrivers, however it IS important to ensure that any Phillips type screwdriver tip you use fits the screw well. There’s two steps to this:
Ensure that the head of the screw is clean, no dirt caked in the screwdriver slot.
Carefully check the fit of your driver. If it bottoms in the center of the screw, it’s too small. Keep testing bits until you find one that locks into the screw solidly.
Small electric drill drivers really speed up the handling of machine screws. The old Dewalt unit I have has LEDs to light up the work and adjustable clutch, great so I don’t overtighten small screws. The handle can be turned in several different configurations too. Though it is primarily for light drilling and screw driver work, you can also use an socket adapter and speed up your wrenching. - Wrenches – all you’ll need are a few small wrenches for carbs. I highly recommend “open end, box end” combo hand wrenches with the ratchetting box end.
- Do NOT use a small spring type impact on carbs if at all possible. Carbs break easily. I’ll cover issues about seized fasteners, etc. in the Carb Tear Down section (part of the Carb Rebuild Details area see link below).
- Cleaning Materials and Parts – Start with what you will likely need to clean your carbs. It is a critical mistake to buy parts before you tear down carbs or any other machinery. Always tear down carefully first, clean everything thoroughly and then you will know more accurately what it is that you need.
These topics will be covered in detail on the Carb Tear Down section (part of the Carb Rebuild Details area see link below).
RETURN TO PREVIOUS SITE LEVELS: